
Use the QuantaDocs mobile app to create and fill out reports while you are on site. Each report starts from a template, which provides the sections and fields you need to complete.
This article explains how to create the Sample Stormwater Assessment, fill out its fields, preview the document, and submit it for review.
Overview
The aim is to create a report, fill out its fields, check the document, and then submit it for review.
- Open a job and create a report from a template.
- Work through the report sections and fill out the fields.
- Preview the document to check how it is being built.
- Complete any missing fields and submit the report for review.
Before you start
Before you create a report:
- Download and install the QuantaDocs mobile app.
- Sign in using your QuantaDocs credentials.
- Make sure the job is available to you in the app.
- Make sure the report template is available to your organisation.
Open Jobs, select the job, and check that the customer and location are correct. The report can use this information, so you do not need to enter it again.
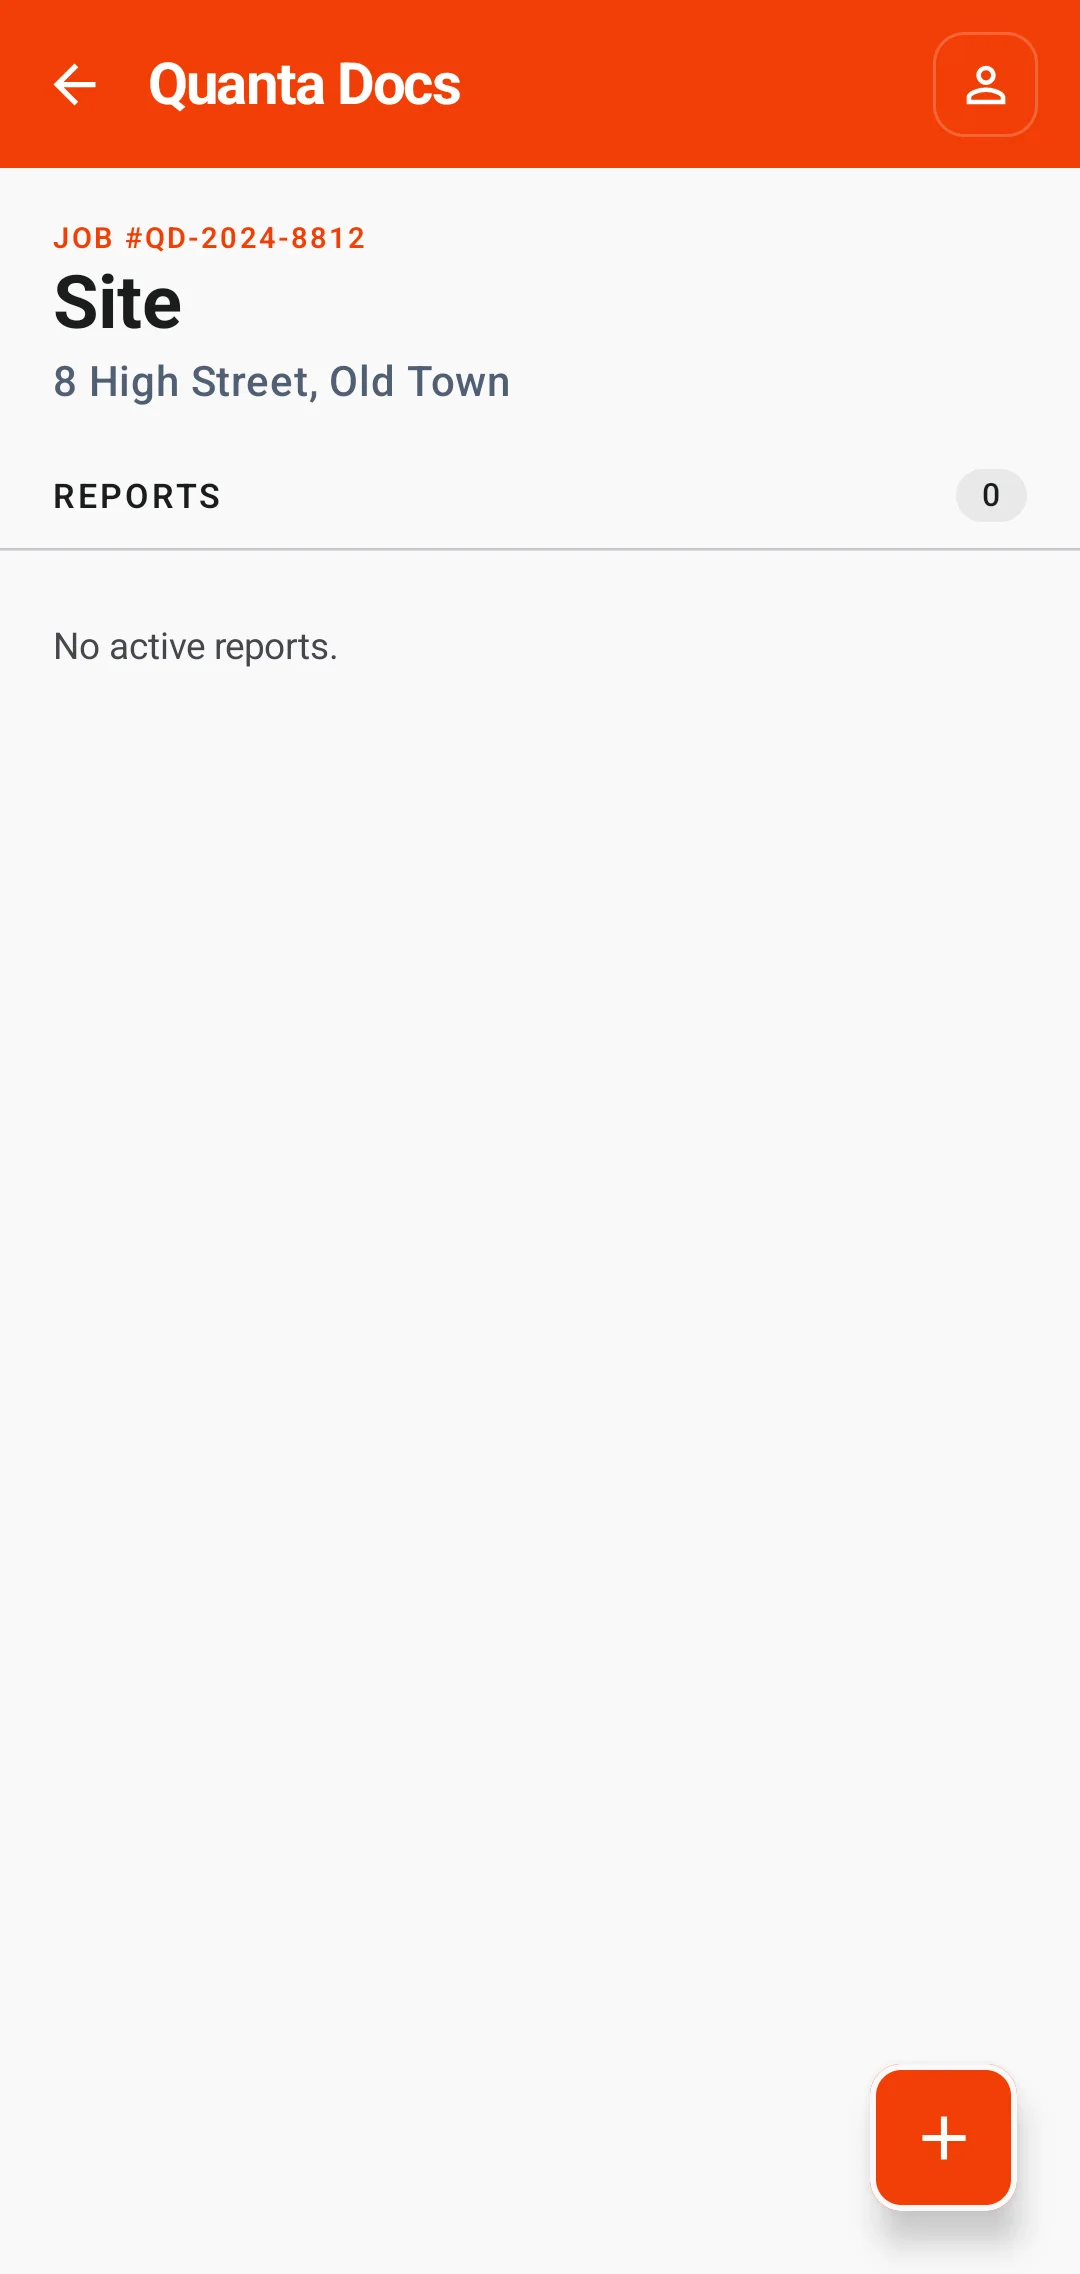
Create the report from a template
- Select New report on the job page.
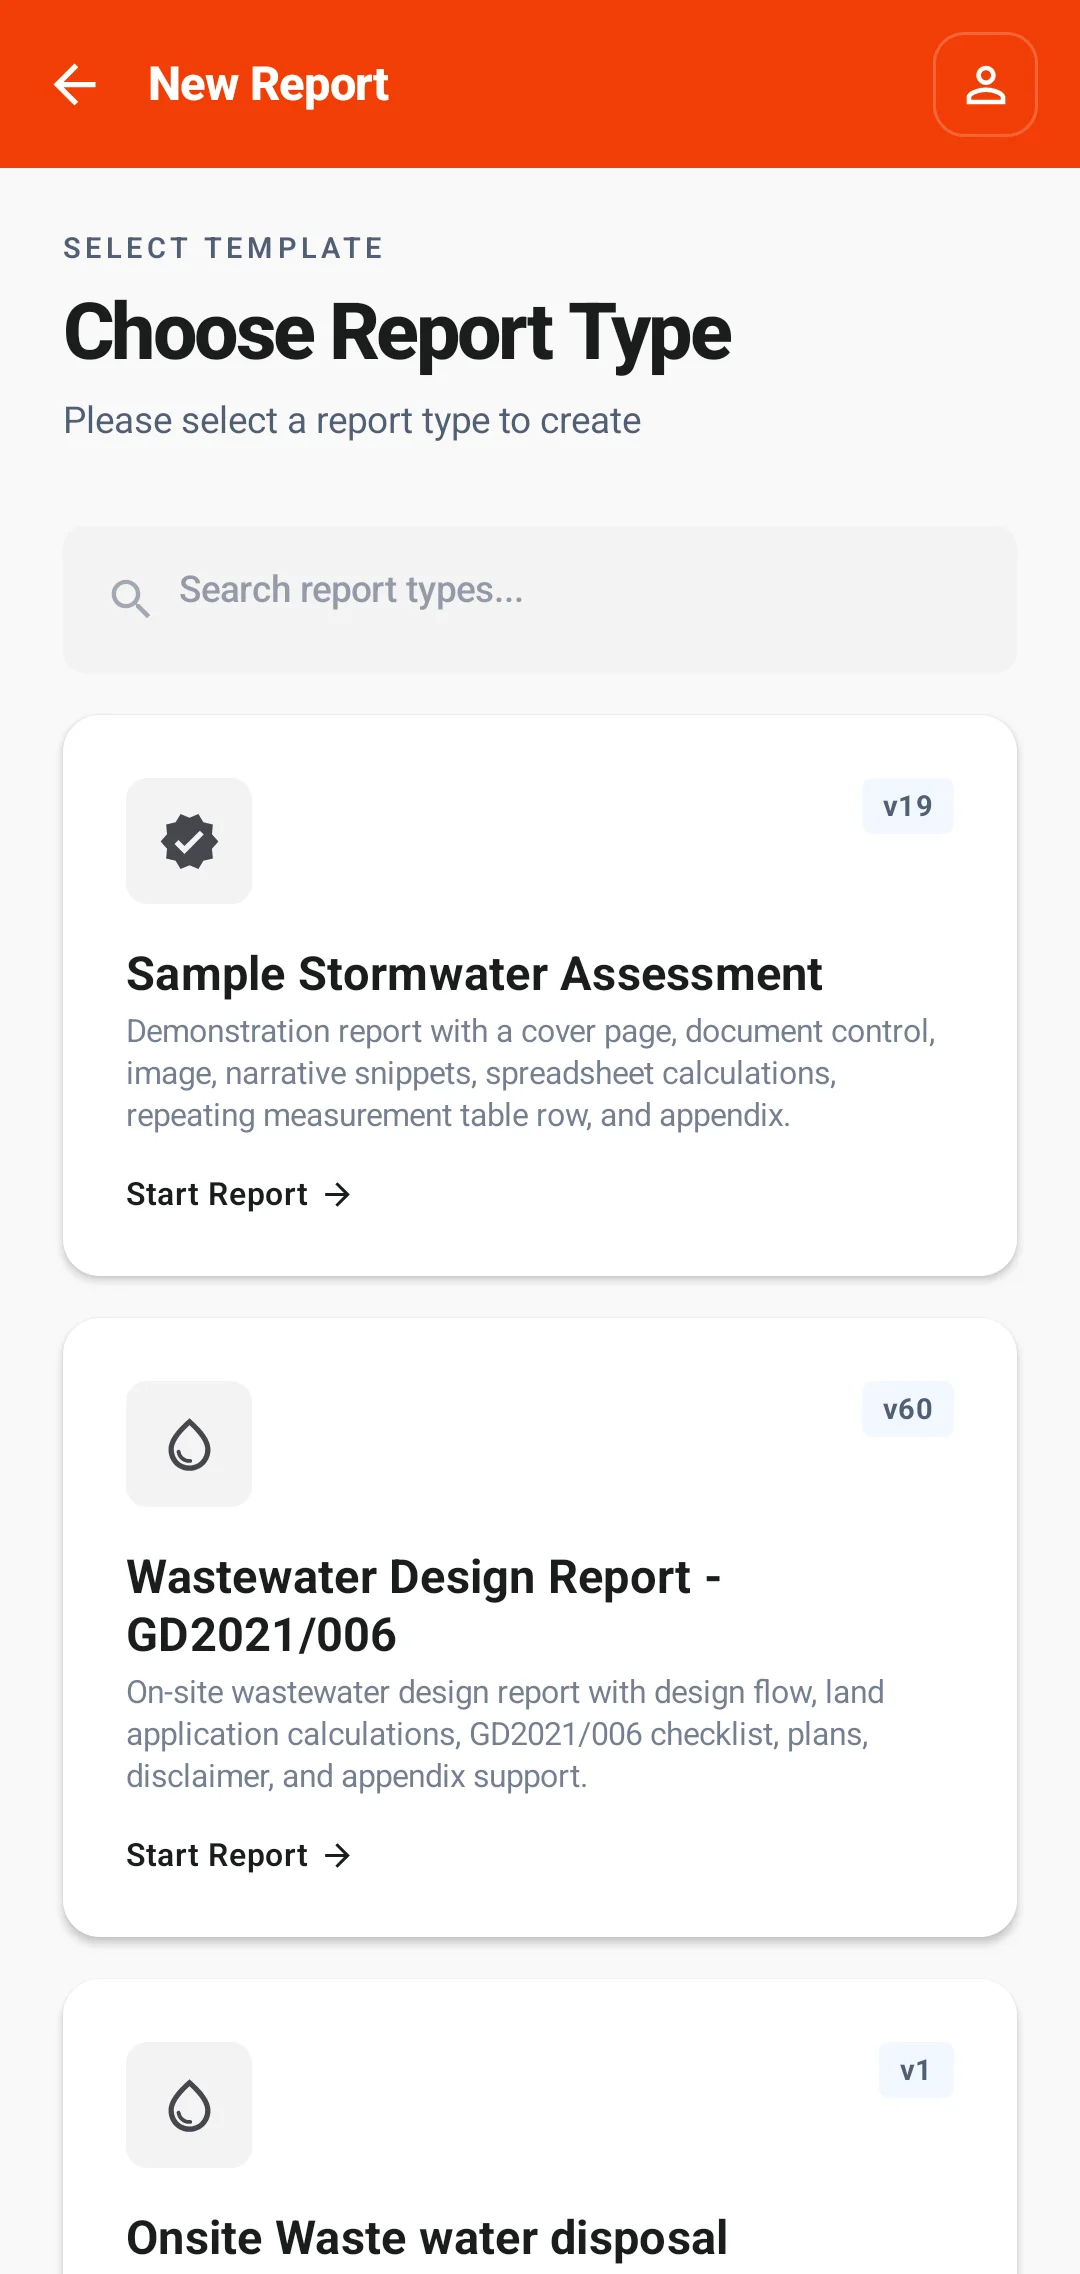
- Search for Sample Stormwater Assessment, or scroll to it in the template list.
- Review the template description, then select Start Report.
QuantaDocs creates the report and opens its overview. The sample report includes Document Control, Introduction, Proposal, Calculations, and Measurements. It also includes a cover page and a sample PDF appendix.
Use the report overview
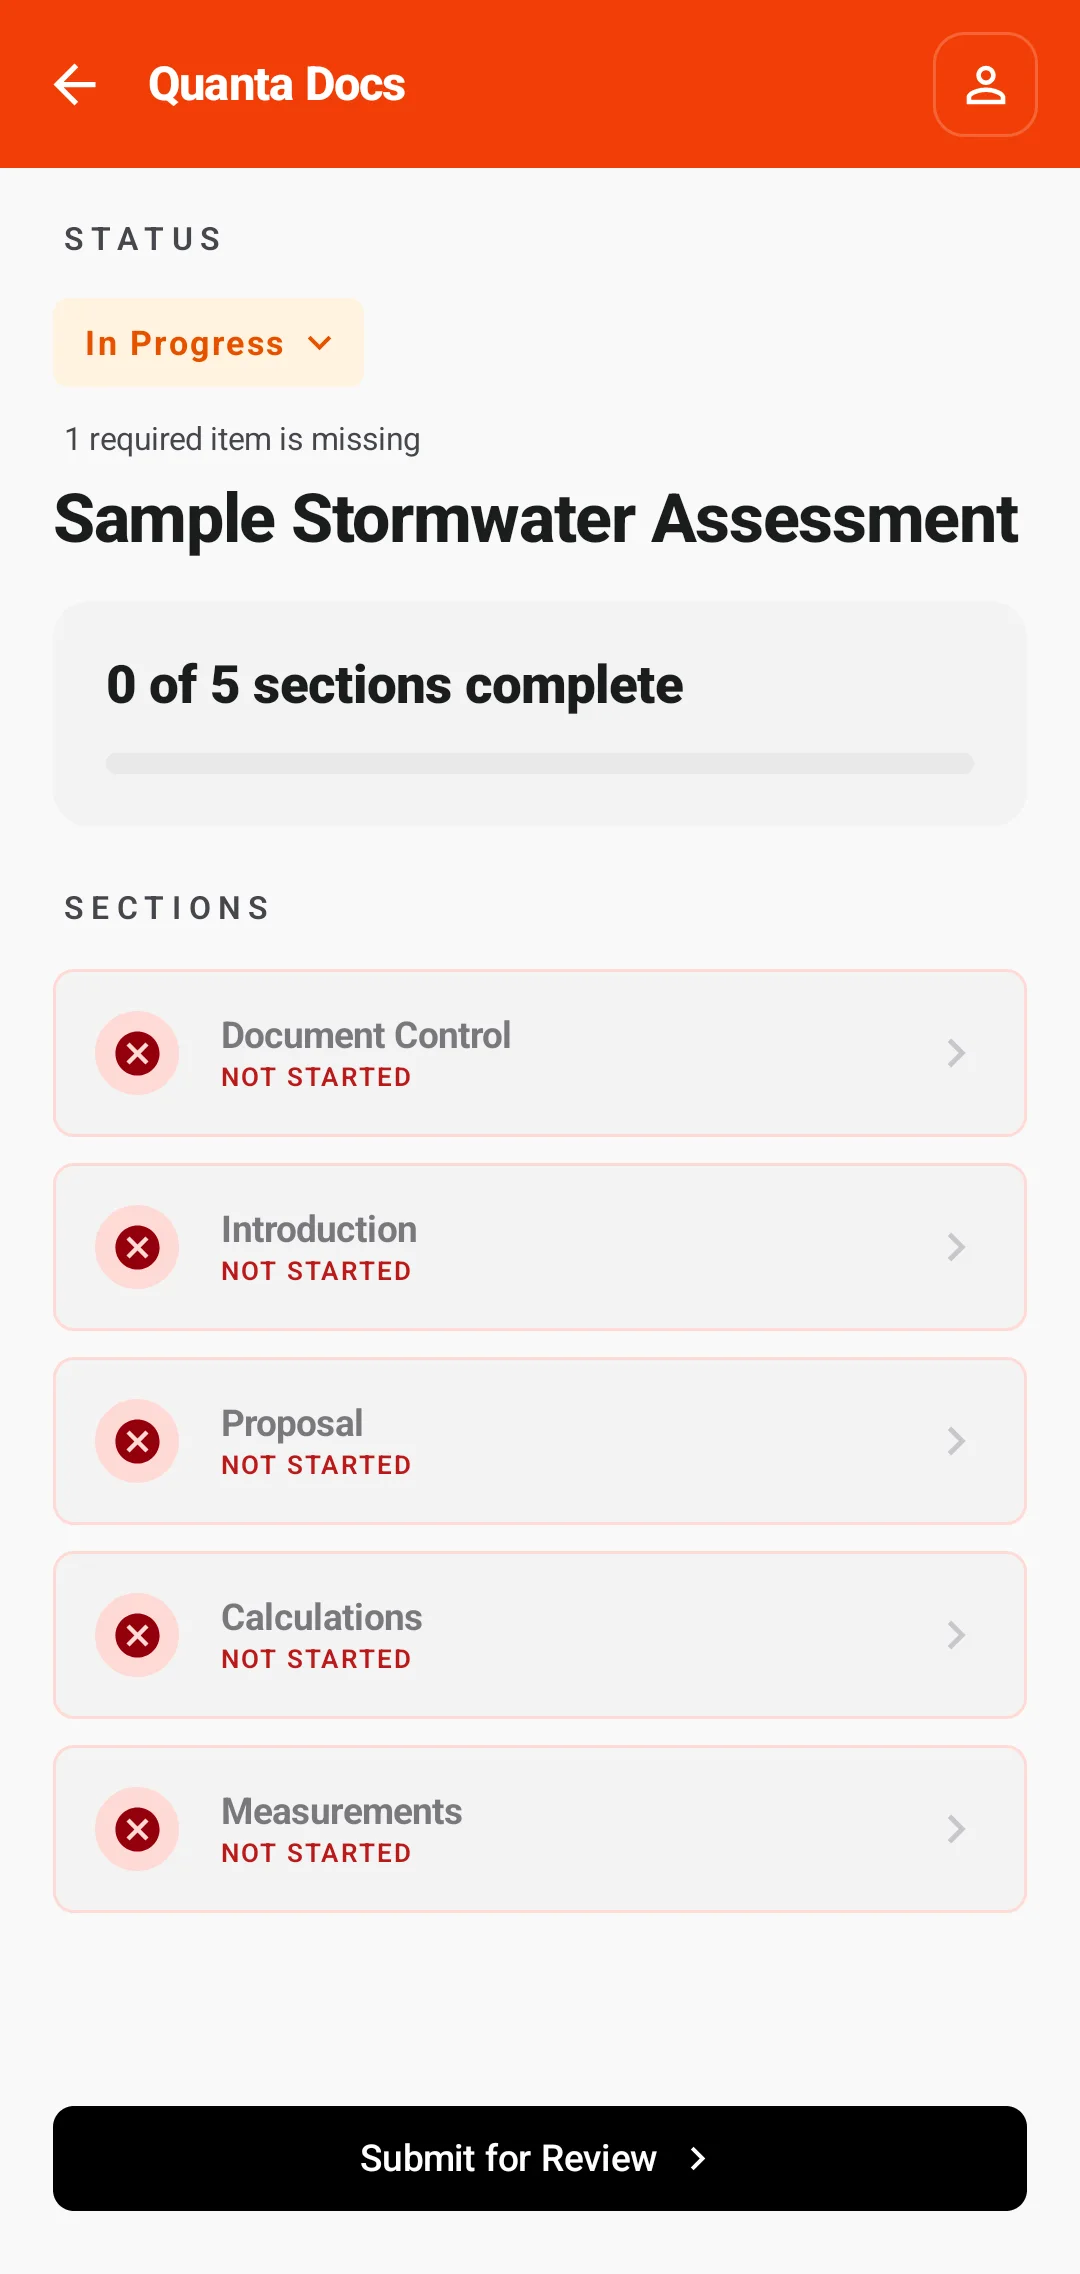
The overview shows the report status, progress, missing items, and all report sections. Select a section to fill out or change its fields.
- Not started means no field in the section has been completed.
- Required fields missing means work has started but at least one required value is empty.
- All required fields complete means the section has the values needed for submission.
A section is counted as complete when all of its required fields have been filled out. You can still change it later.
Complete the report sections
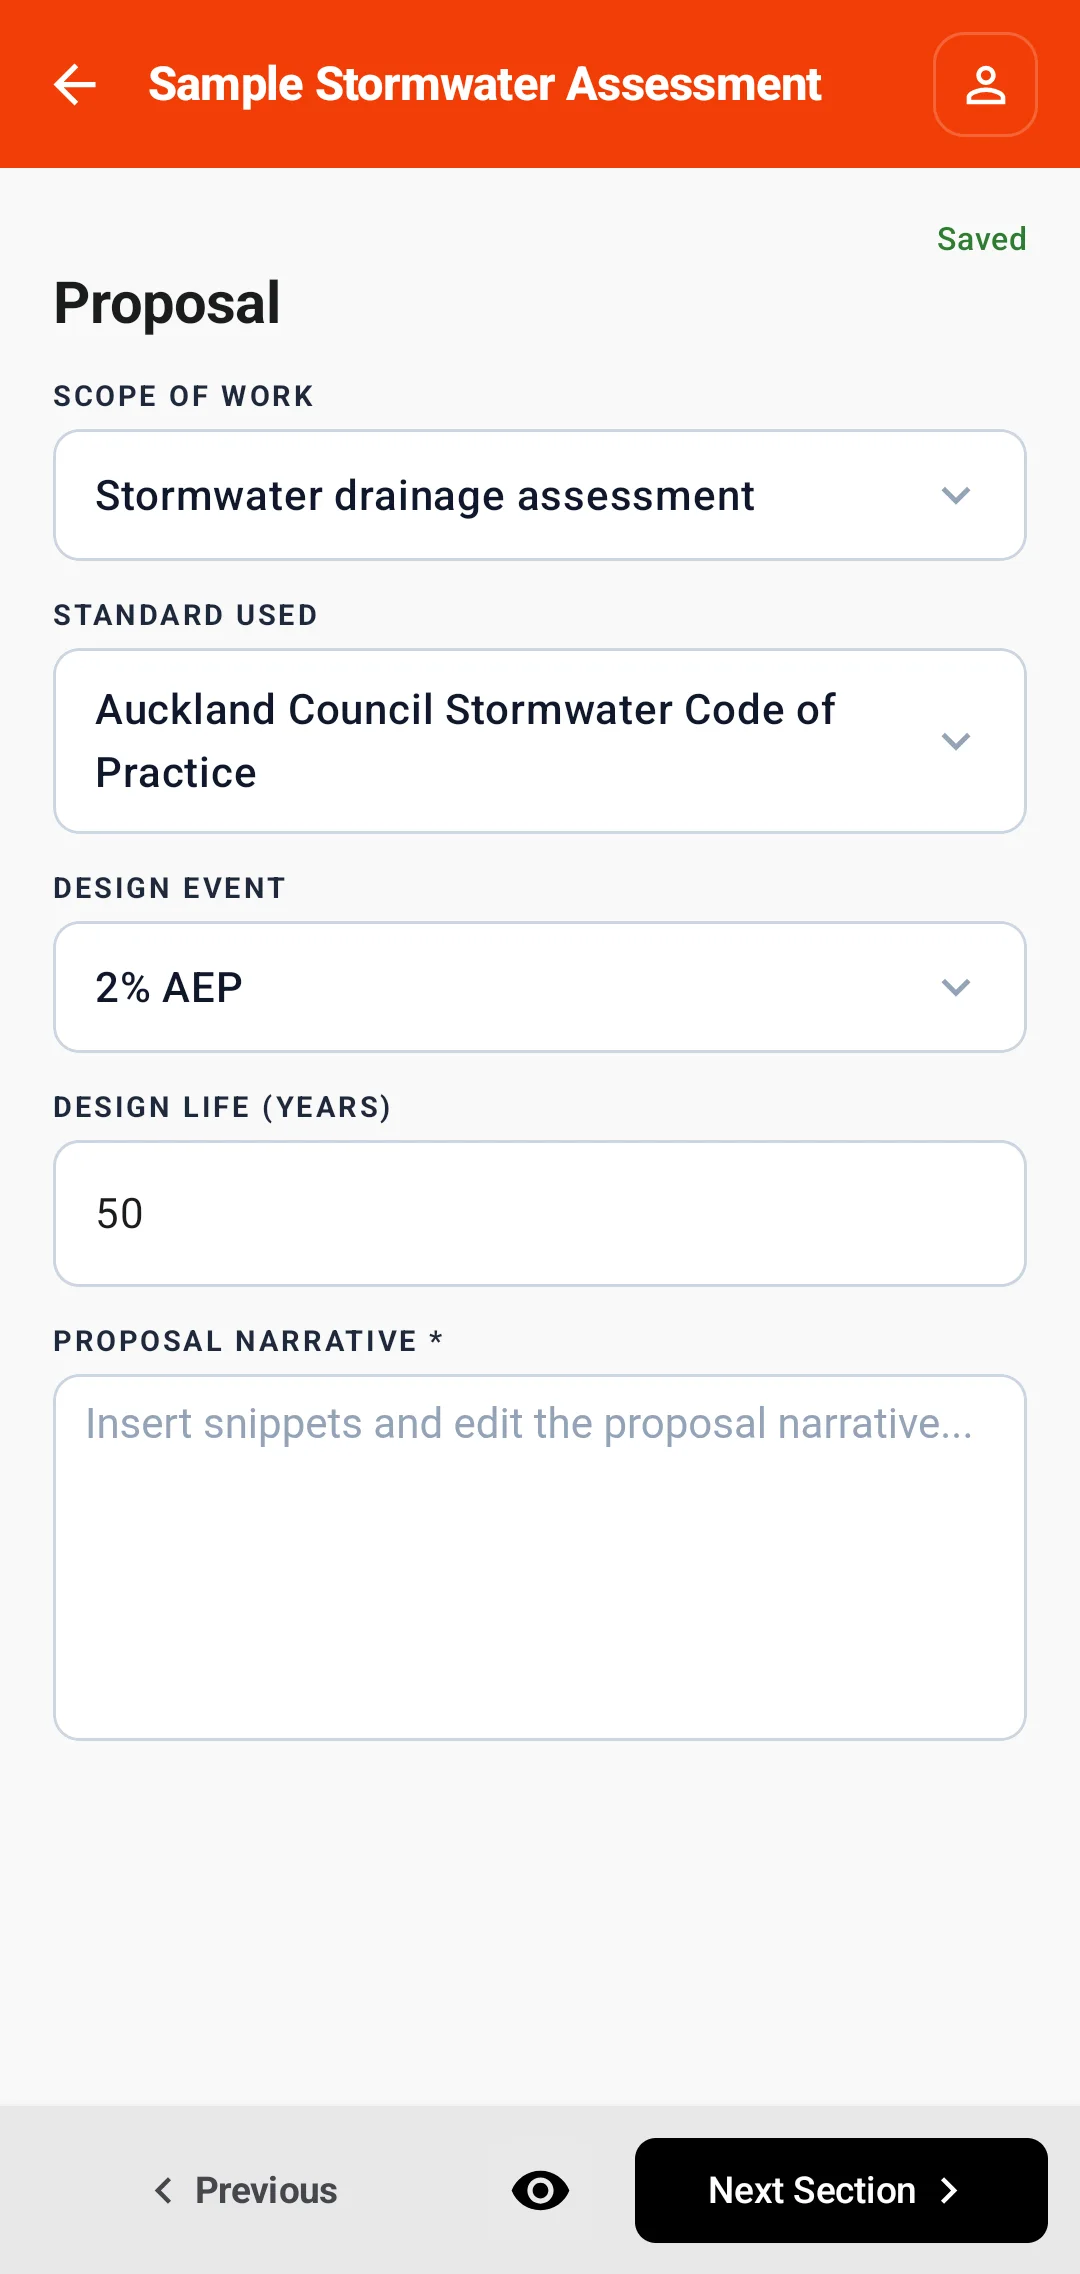
Work through the sections in the order that suits the job. Select Previous or Next Section to move between sections. You can also return to the overview and open a section directly.
- Document Control records the document title, revision, issue date, author, reviewer, and approval information.
- Introduction records the project details and a site image.
- Proposal records the scope, standard, design event, and design life.
- Calculations uses the values you enter to calculate the peak runoff and design flow.
- Measurements records each measured location and adds it to the report table.
Changes save as you work. Check for Saved at the top of the section. If you are offline, the app may show Saved offline until it can connect again.
Add text using snippets
Snippets are saved pieces of text. You can insert them into the report and then edit them for the current job.
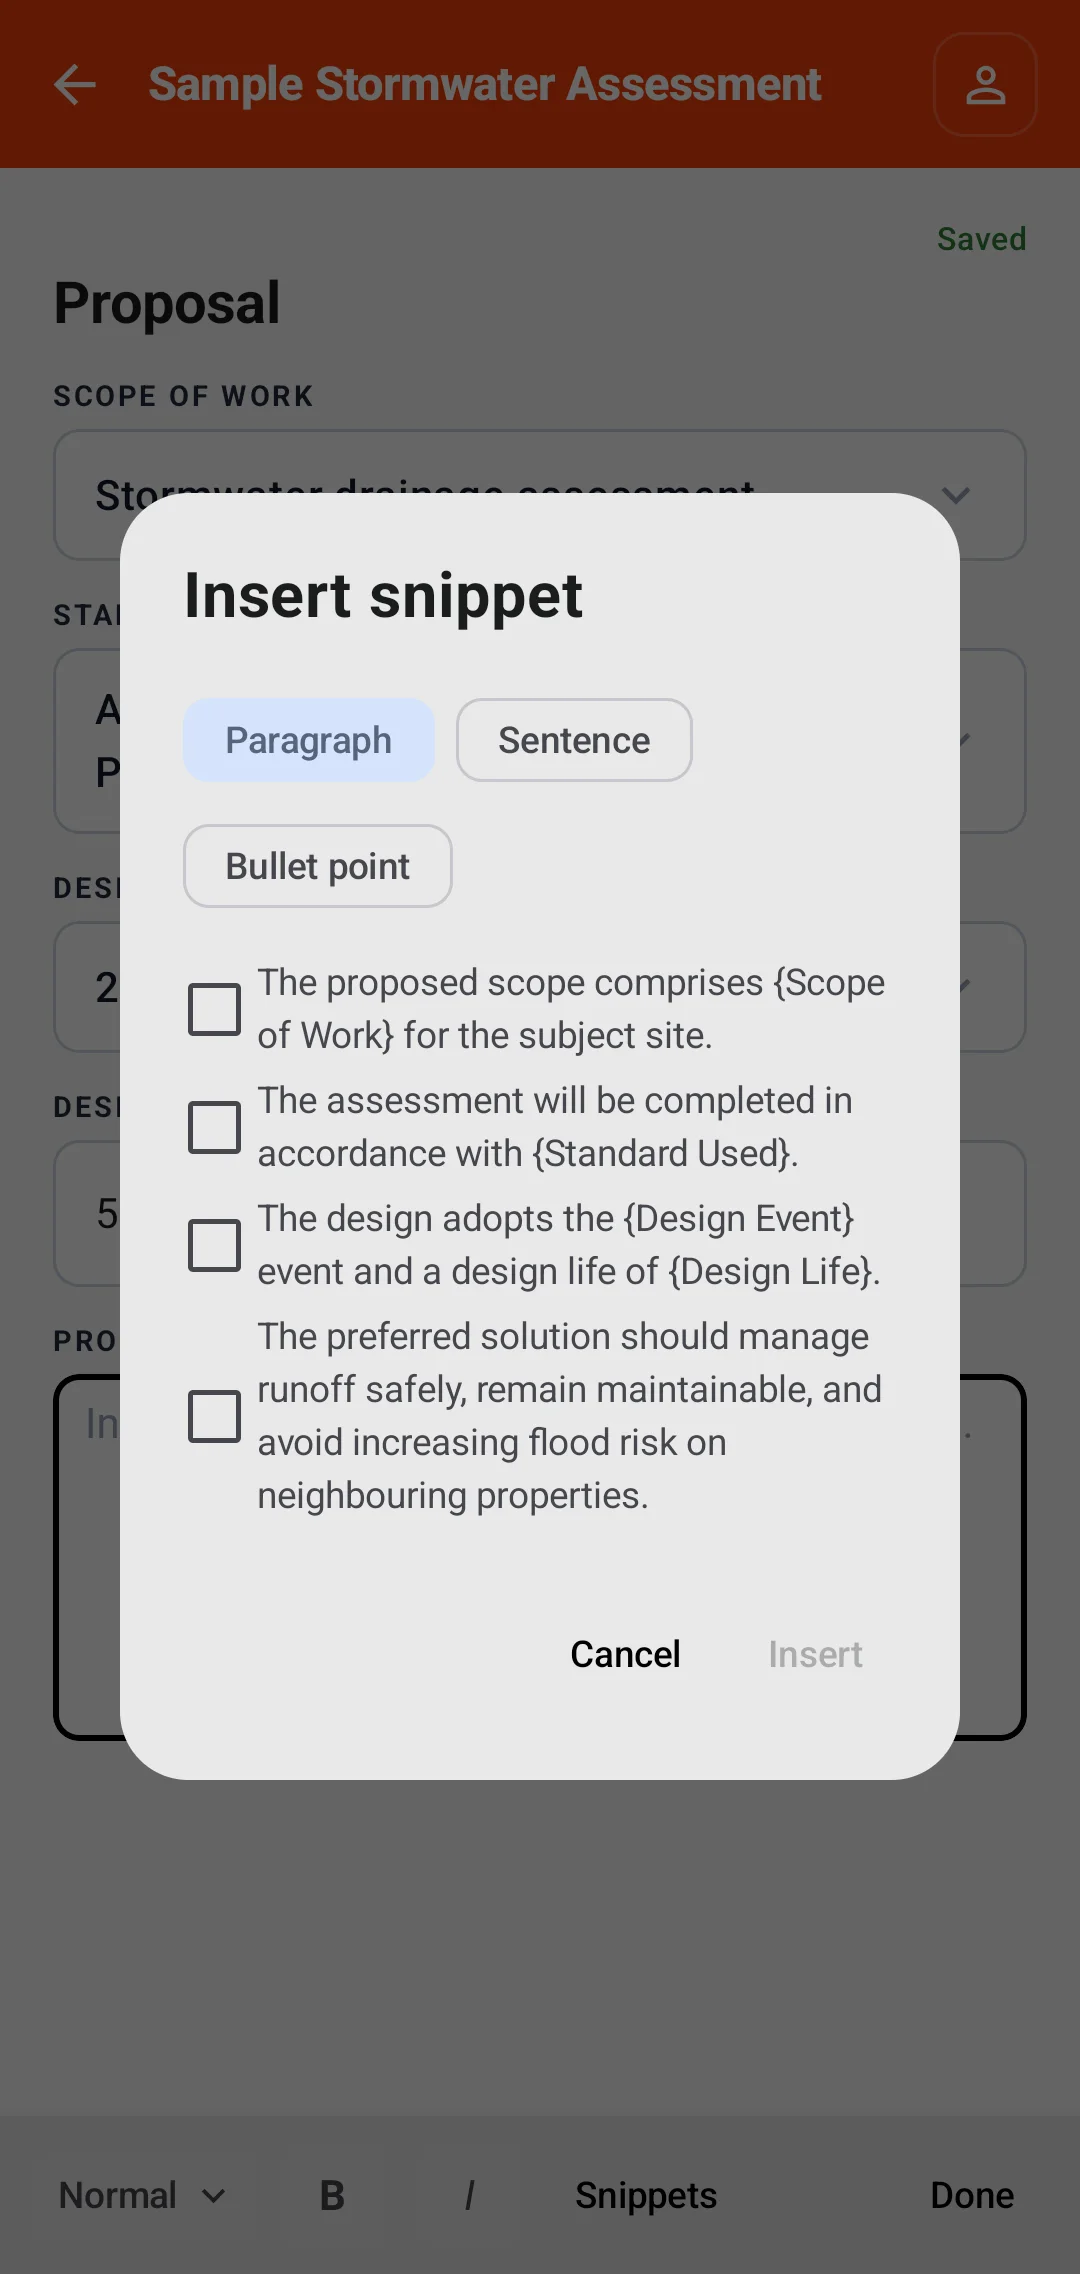
- Select the Proposal Narrative editor.
- Select Snippets in the formatting toolbar.
- Choose whether the selected content should be inserted as a Paragraph, Sentence, or Bullet point.
- Select one or more snippets, then select Insert.
- Edit the inserted text as needed, then select Done.
Some snippets use values from other fields. For example, the sample snippets can use the selected Scope of Work and Standard Used.
Add measurements
- Open the Measurements section.
- Select Add Measurement.
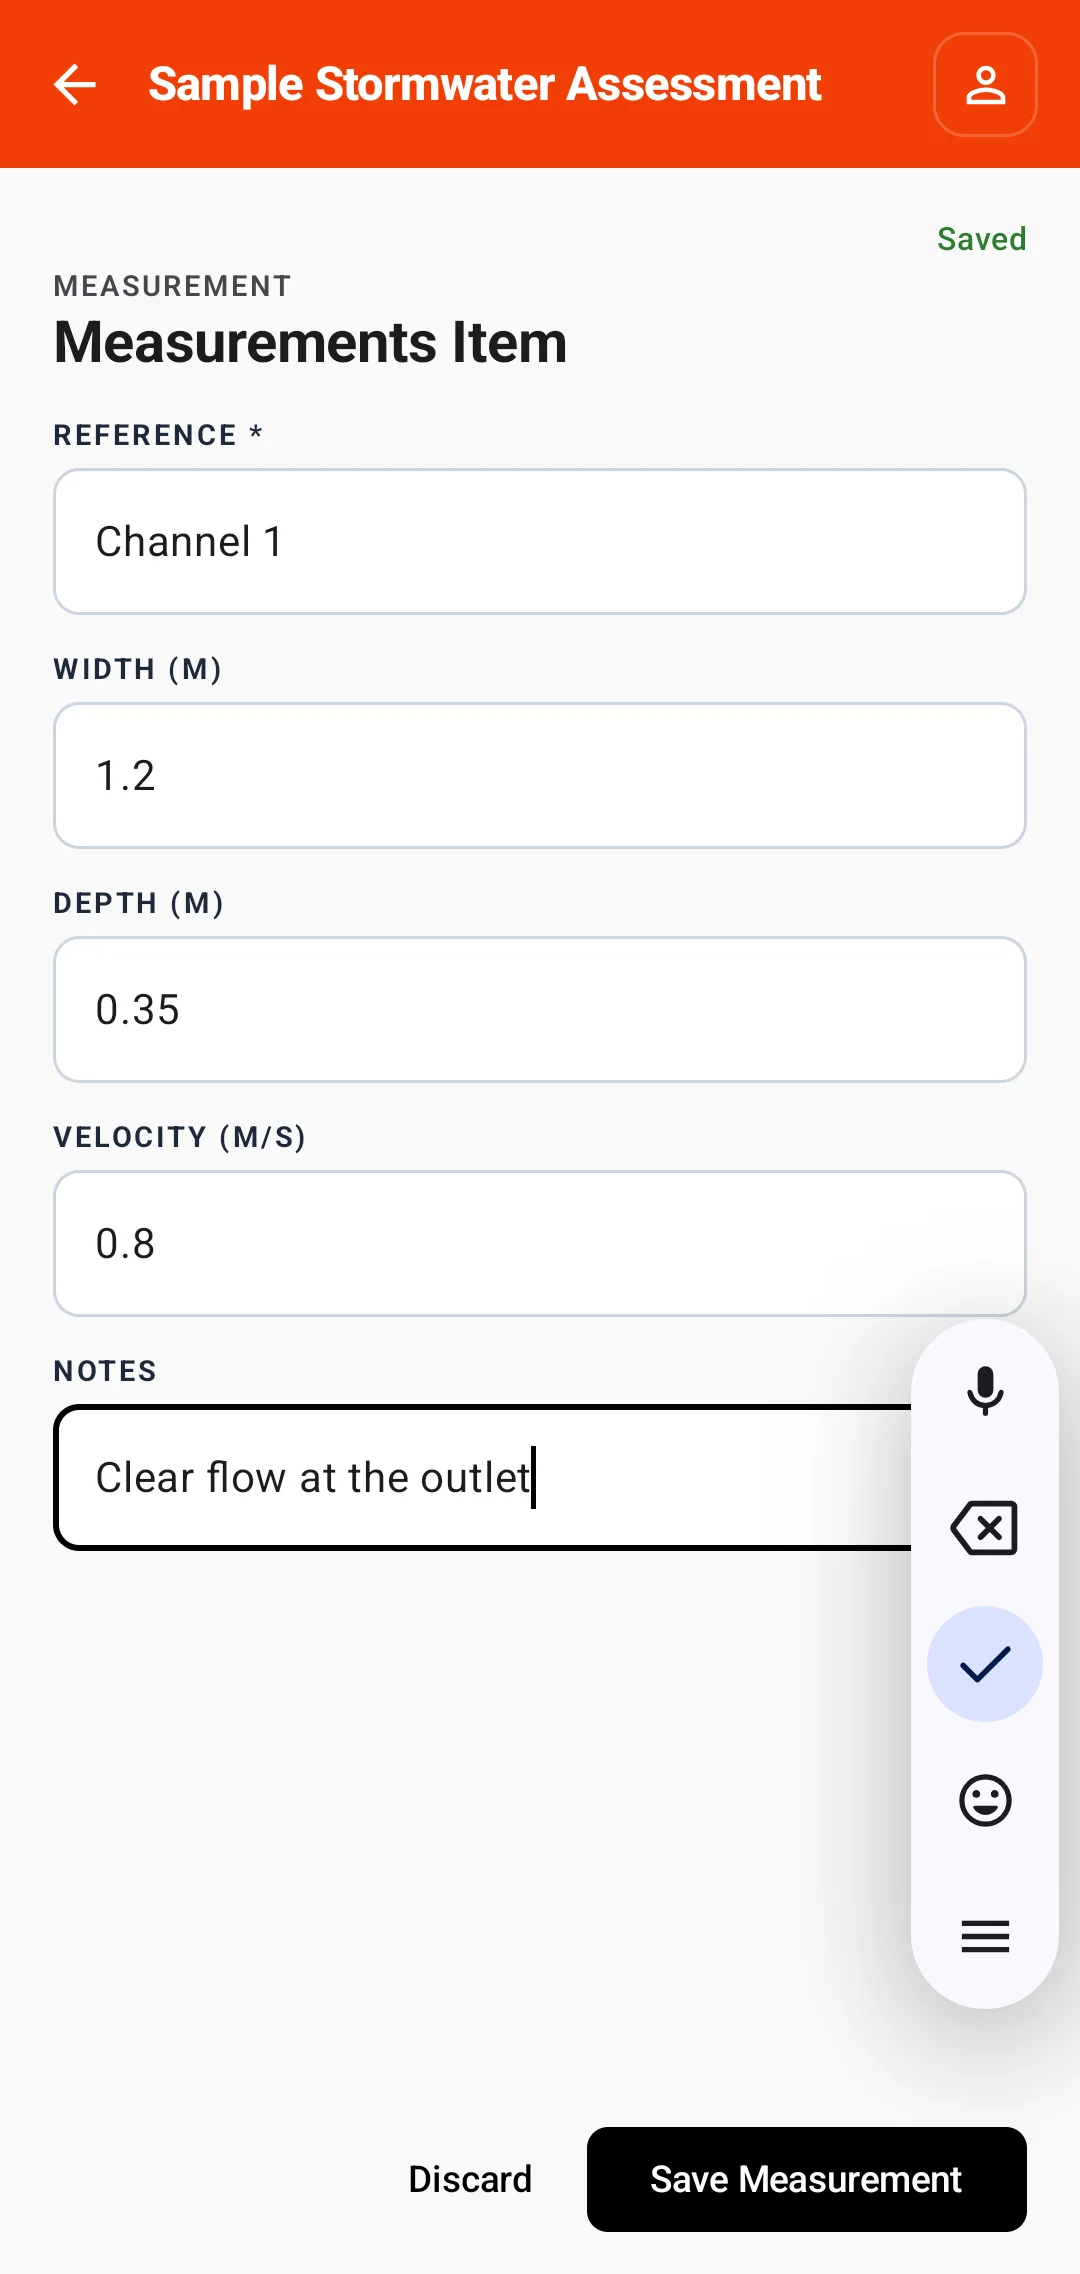
- Enter the reference, width, depth, velocity, and any useful observation.
- Select Save Measurement.
The saved measurement appears in the section. Select it to edit it, use the delete icon to remove it, or select Add Measurement to add another one.
Preview the document as you add content
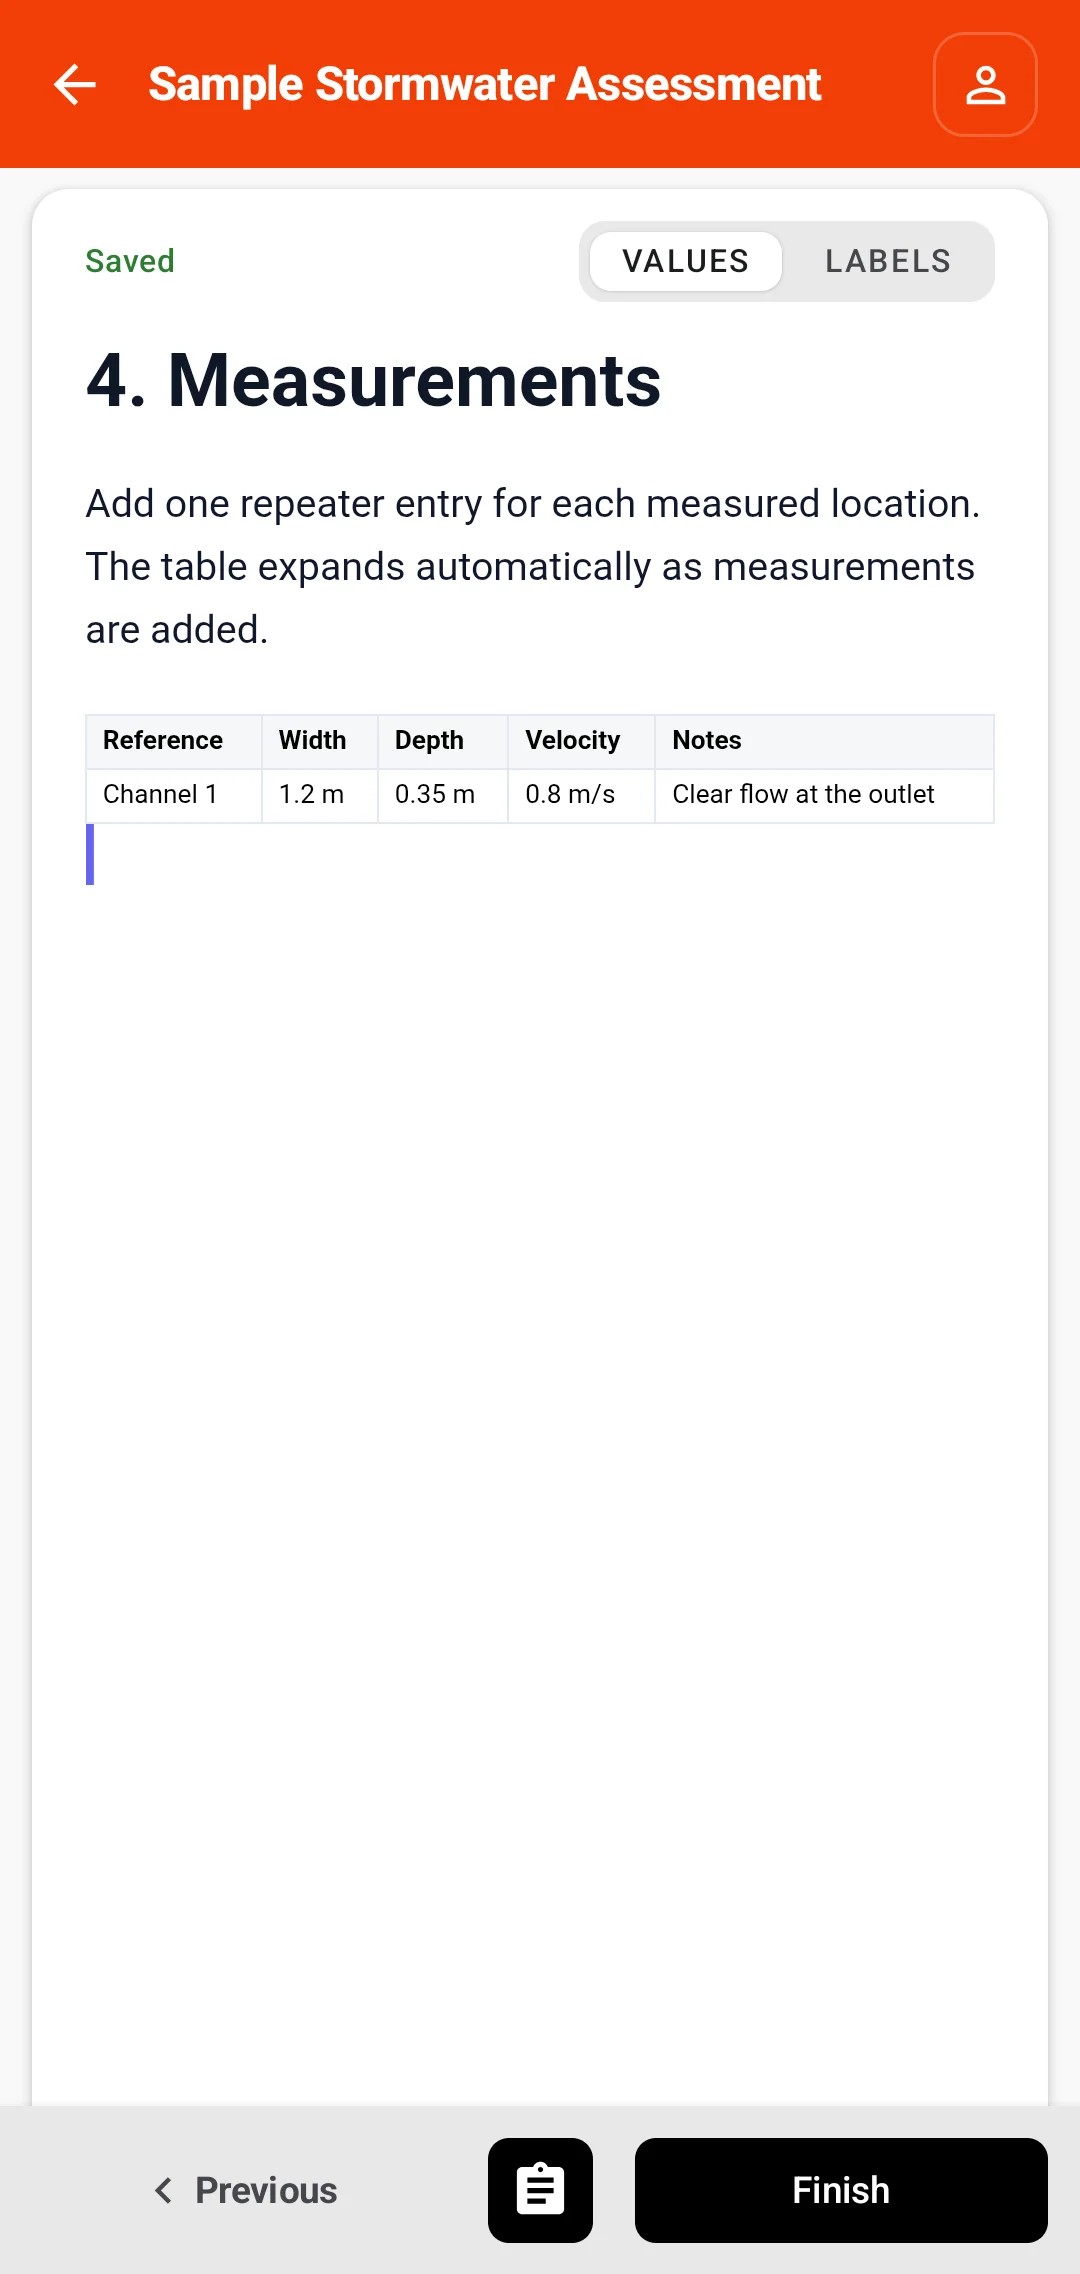
Select the eye-shaped Preview button in the bottom bar. Preview shows how the current section will look in the report.
After you save the first measurement, it appears as one row in the table:
Select the clipboard-shaped Show fields button to return to the fields. Add another measurement, save it, and open Preview again. The second measurement is added as another row:
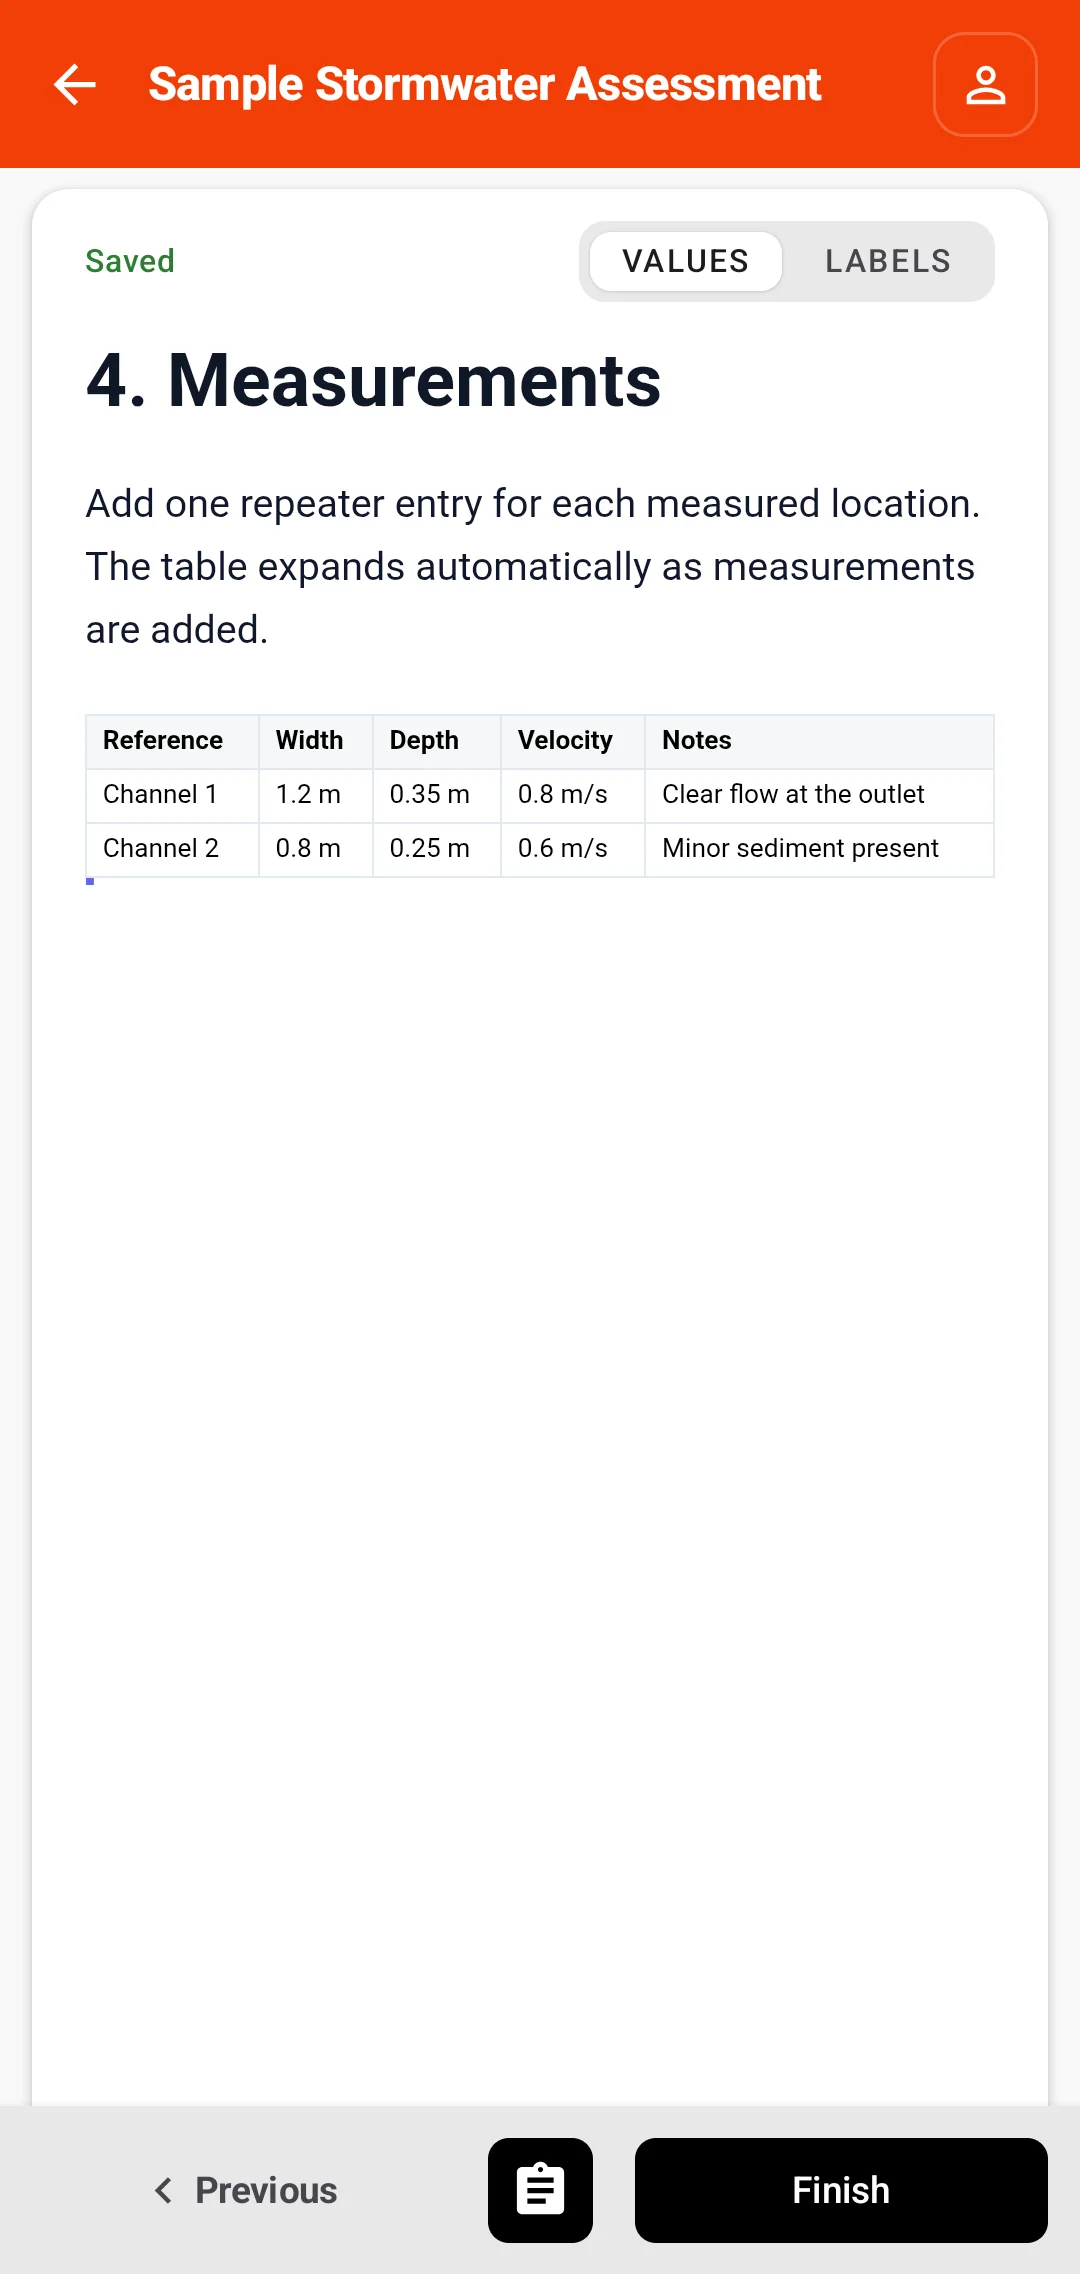
Use Preview as you work to check the text, images, calculations, and tables. Select Values to see the report content. Select Labels to see which fields are being used.
Finish and submit the report
- Select Finish in the final section to return to the report overview.
- Check the missing-items message and section progress.
- Open any incomplete section and fill out the missing required fields.
- Wait for the current section to show Saved.
- Select Submit for Review.
The report changes from In Progress to Awaiting Review. A reviewer can then check the report before it is approved and issued.